
Import Data in Excel using Power Query
Power Query is an amazing tool to import data from almost any popular or semi-popular data source in Excel. One can import any database, which can be in any format like .txt, CSV, JSON, Access etc. or from any database form like Azure, SQL, ODBC, DBMS, Oracle, IBM etc. One can also import any website’s live data, which could be automatically updated on a given time period. Yeah! it is possible.
In addition to just importing the data from different sources, it also helps to:
- edit the database
- transform the database
- delimiting the data
- exchange the columns etc.
Note: Power Query works in MS Office 2013 and upper version only. If the add-in is missing then the same can be downloaded from https://www.microsoft.com/en-in/download/details.aspx?id=39379.
Excited! Let’s get started.
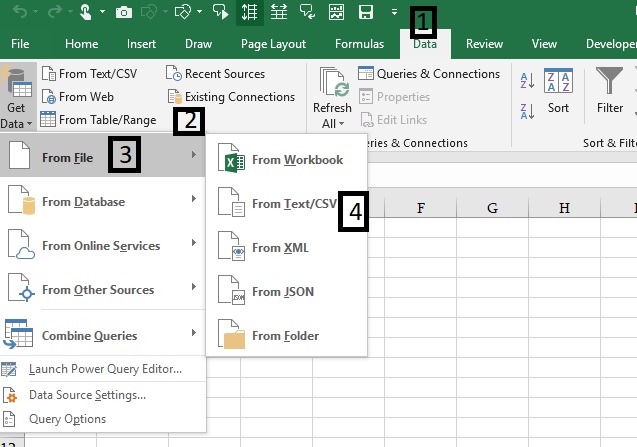
A. Importing Text/CSV files
- Go to Data Tab
- Get & Transform Data Group
- Get Data
- Text/CSV file
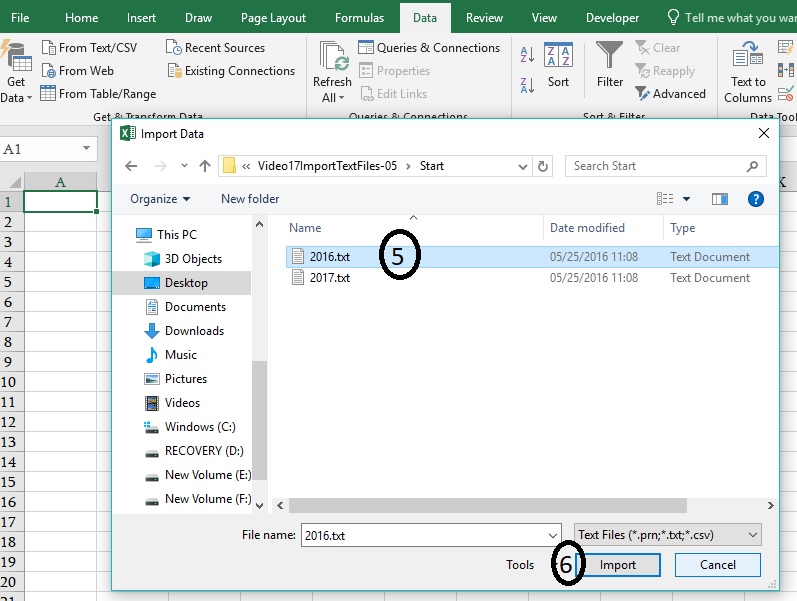
- Select file
- Import
Clicking on the import button will open up a dialogue box in which one can delimit the data as per the requirement.
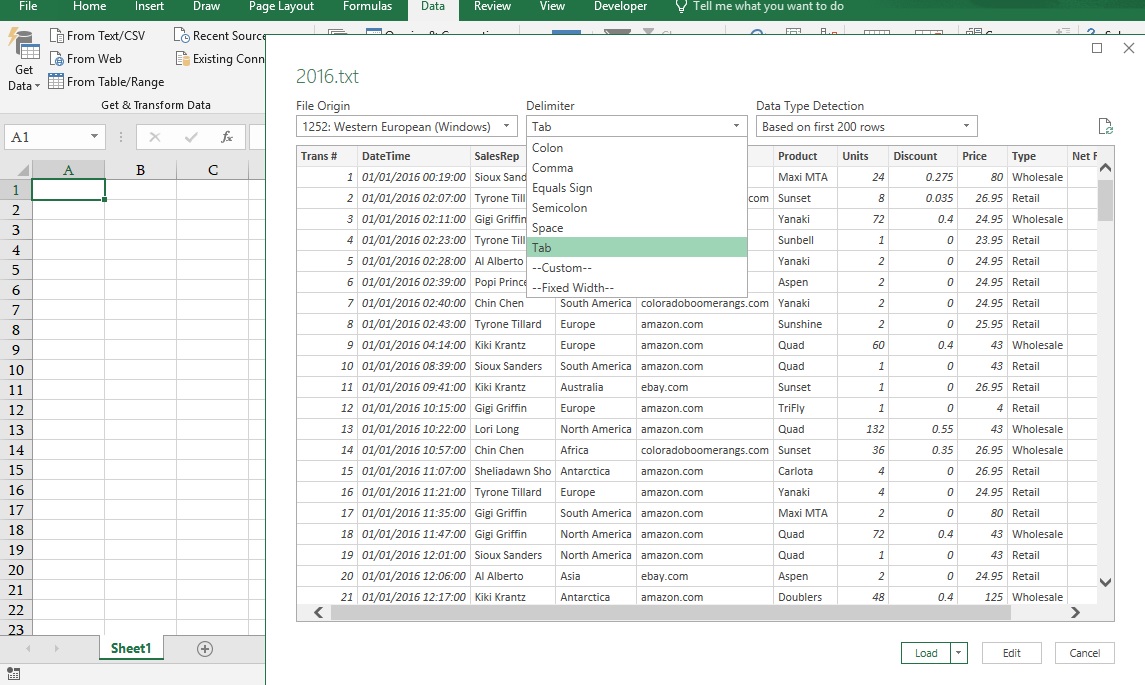
As shown in the screenshot above, one can either go with any of the delimiters mentioned in the list can choose custom and define our own delimiter.
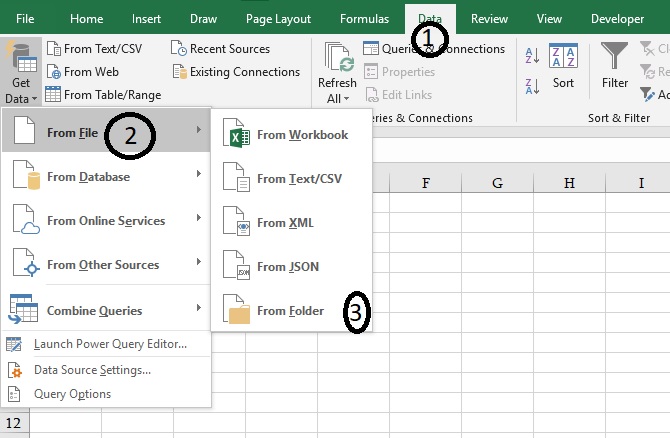
B. How to Import Folder
Instead of importing data from a single file, one can import a complete folder containing multiple fines and the same can be linked and the imported data will be updated once any change happens in the linked folder.
- Go to Data Tab
- Get Data
- From Folder
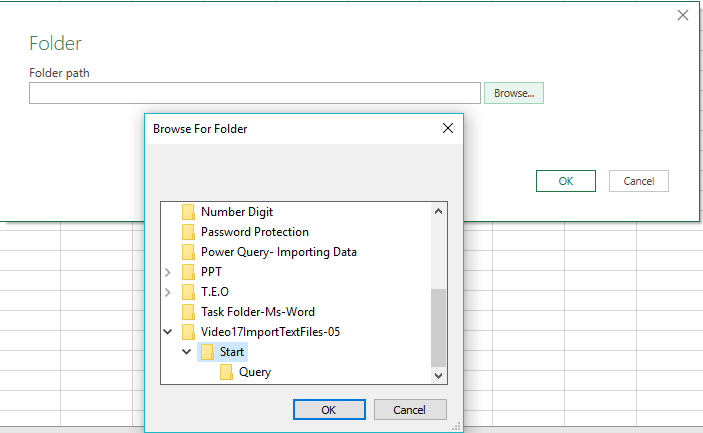
- Browse
- Select folder
- Ok
Browse the required folder and click Ok.
After clicking Ok, it will open another dialogue box showing 3 options-
- Load- It will directly load the data into Excel.
- Edit- It will give us an opportunity to edit the data first and load it.
- Cancel- Uploading gets cancelled.
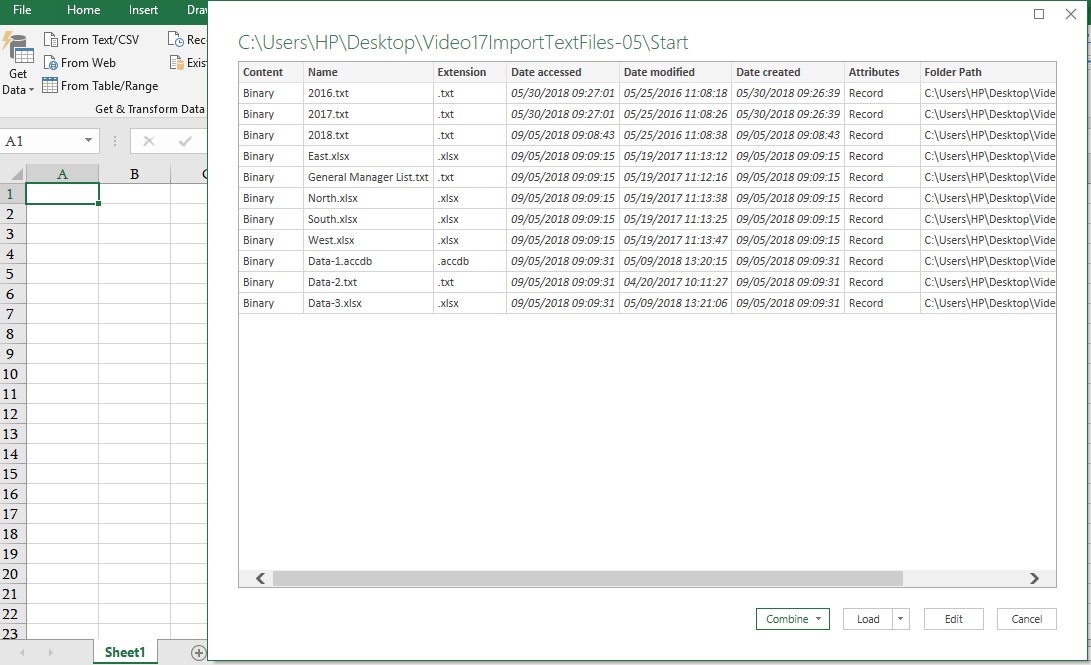
In the screenshot above, the extension column showing the presence of more than one file format and as we need only Excel then one should click “Edit”, this will open Power Query window.
Note: A detailed explanation of the “Microsoft power query editor” Page can be referred in another blog post (provide a link here).
Further steps to edit the data-
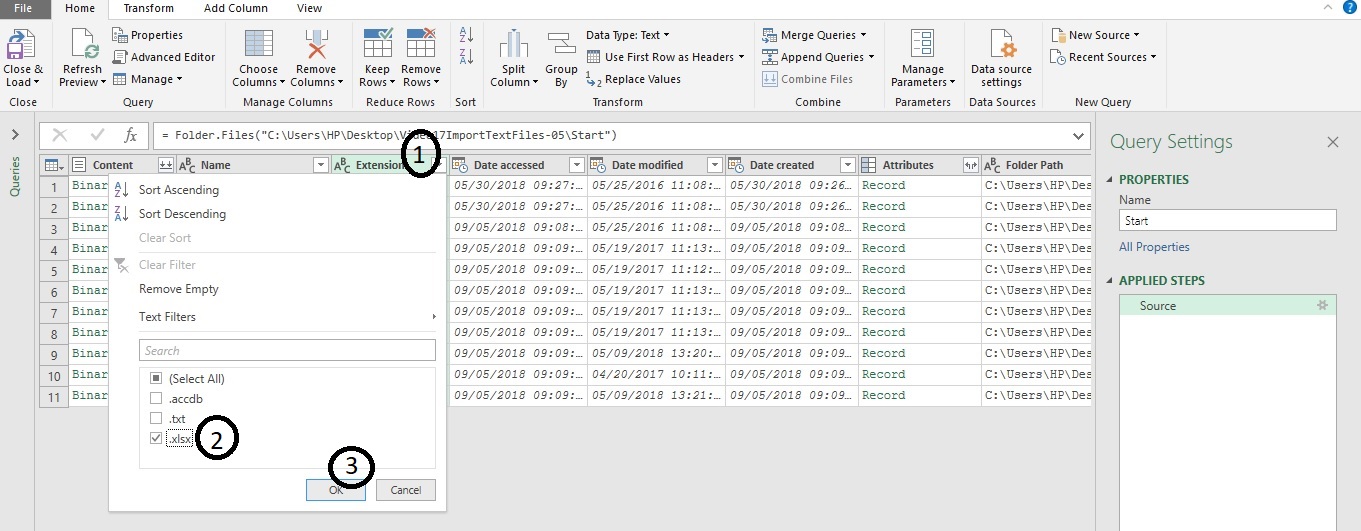
1- Click on Extension Filter button-> select “.Xlsx” ->Ok/Enter
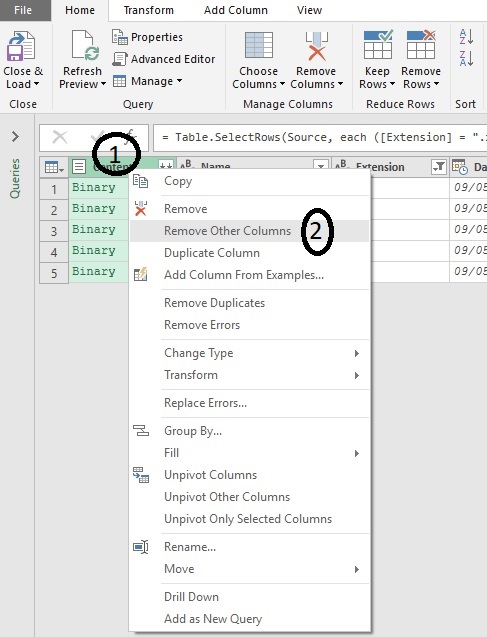
Right-click on Binary->Remove Another Column
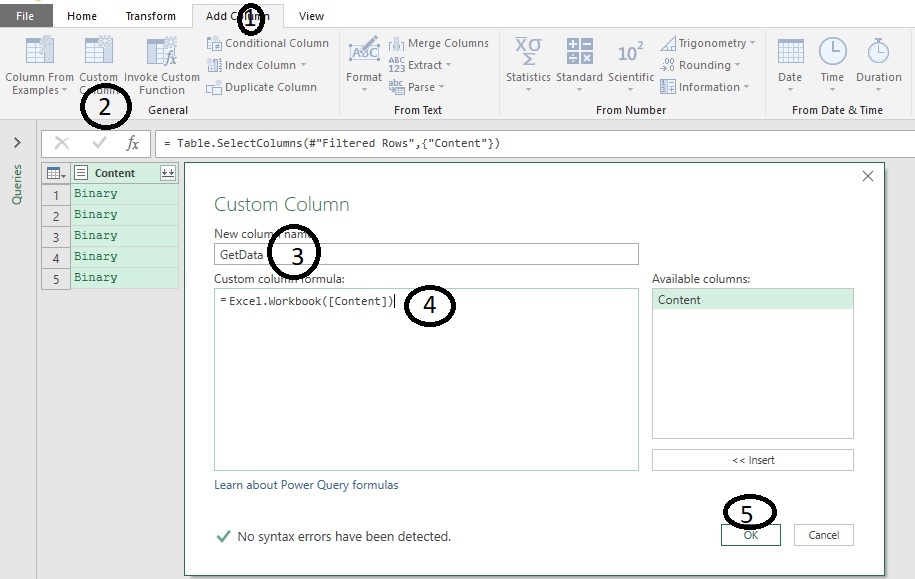
- Add column->Custom Column- Type a Name in newly open dialogue box Ex.-“Get Data” -> Type a formula “Excel.Workbook([Content])->Ok
Note: Formulas are case sensitive.
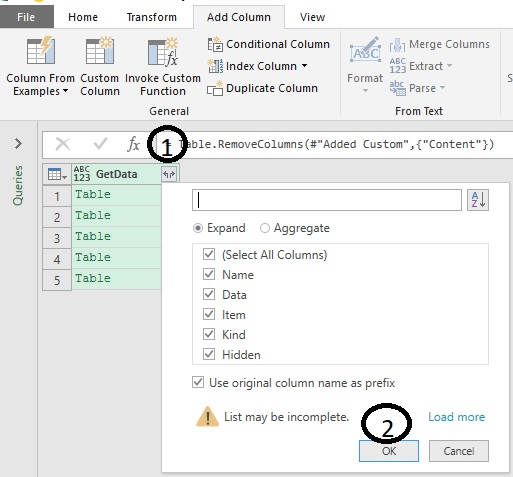
- A new Tab “Get Data” added and now right click on the binary column and remove it.
- On the right side of the heading “Get data”, there is a 2 headed arrow button is visible, this is an Expand buttons. Click on it to Expand the rest of the columns.
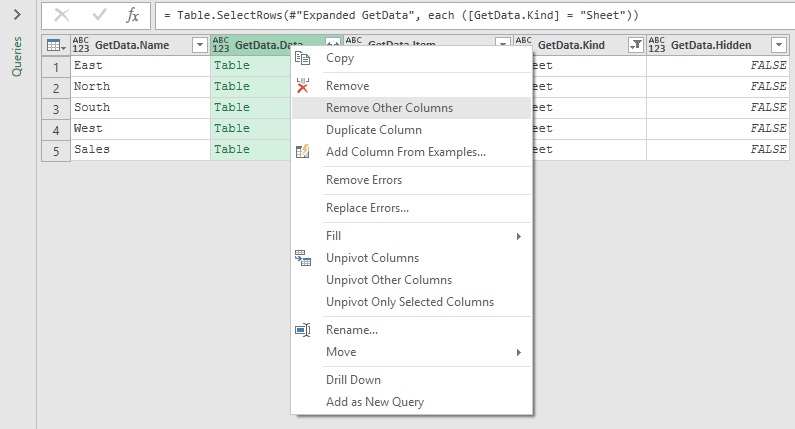
- Column “GetDataKind”->Click on filter button-> select “Sheet”->Ok
- Right click on column “GetData.Data”->click on Remove other columns.
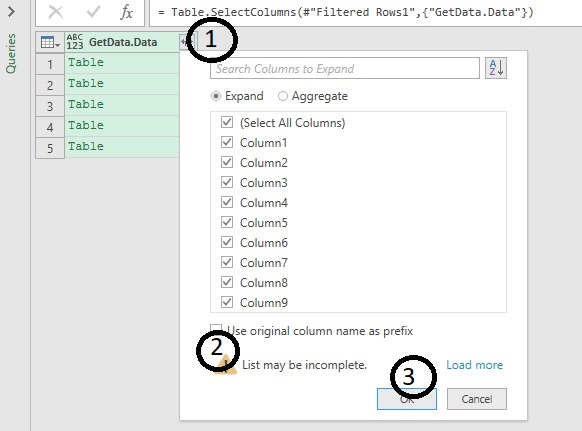
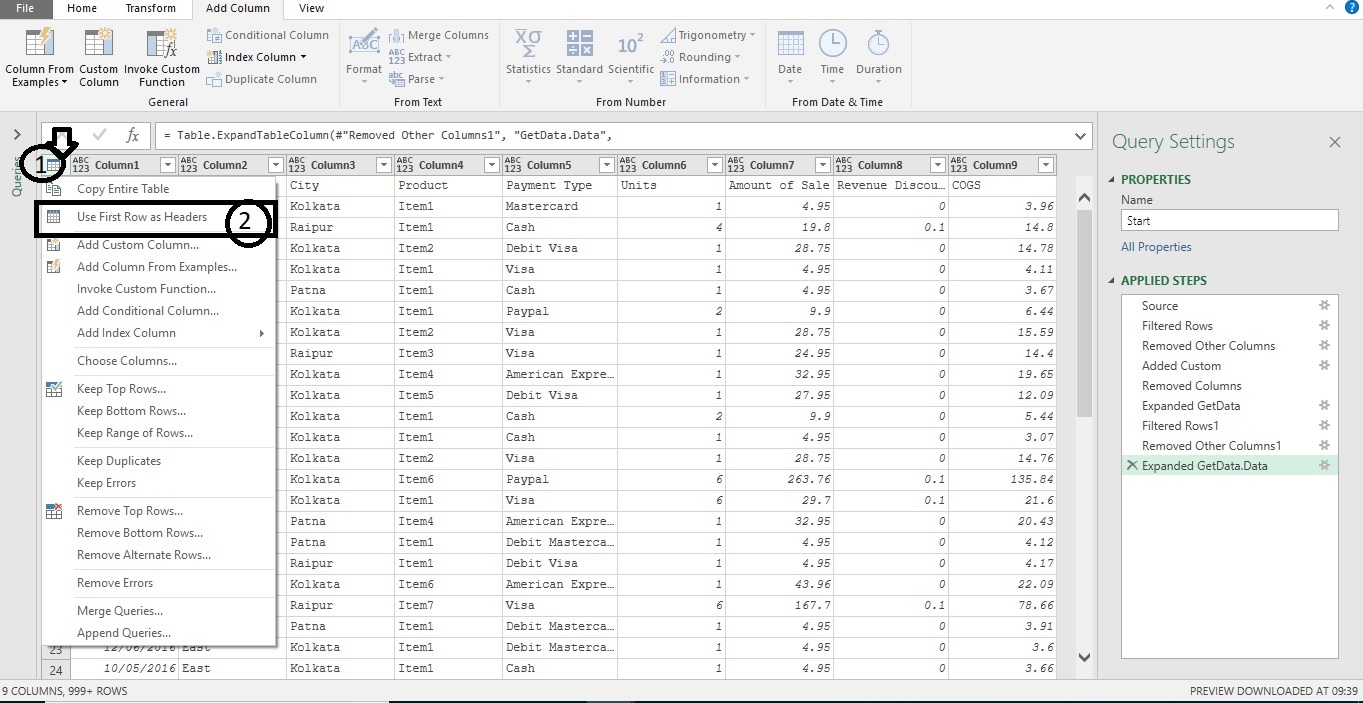
- Column “GetData.Data”-> click on expand button-> Uncheck the “use original column as a prefix”->Ok
- Once one click on Ok, all the data will get consolidated at one place, However, if Data’s heading is coming in 2nd rows, need not to worry, as one create a correct headers by clicking on the square button which is visible on the upper left corner of the database -> select “use first row as Headers”.
- And now, go to Home tab->Select Close & Load.
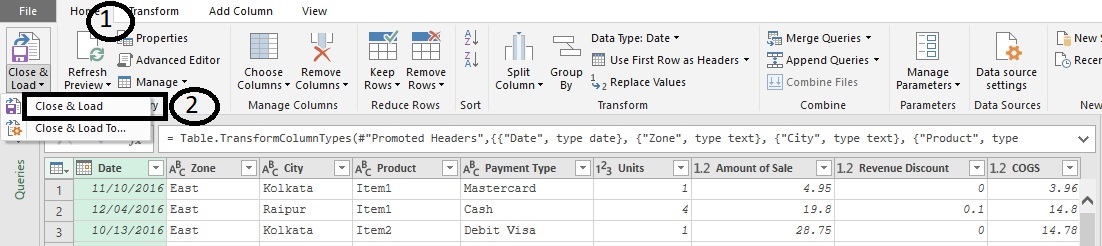
- This will load the whole database into Excel and simultaneously opens up “Query connection” pane on the right side of the screen, which shows the information about the rows/Path/Refresh etc.

C. How to Get Web Data
It’s become much easier and reliable now to import data from a webpage. This will be live also.
- Open the web page which needs to be imported into the Excel.
- Copy the URL

- Open Excel ->Data Tab->Get Data-> From Web

- Paste URL->Ok

- Excel will make a connection with the webpage.
- After the connection established, one will get a new window (A list of the tables will be available, by clicking on any table, one can see the preview of the table’s data on the right side)
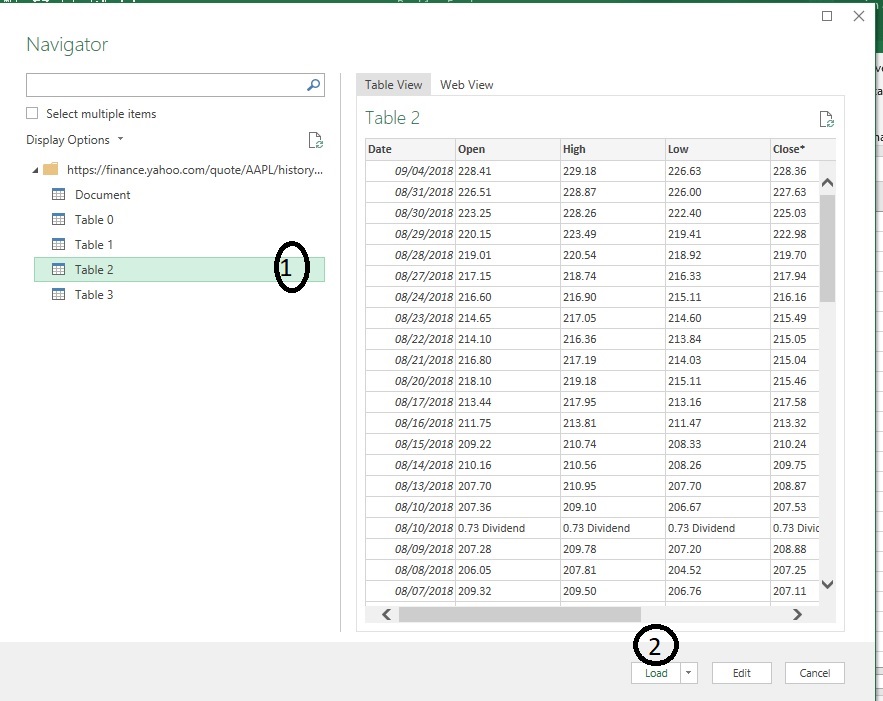
- Select table ->close & Load.
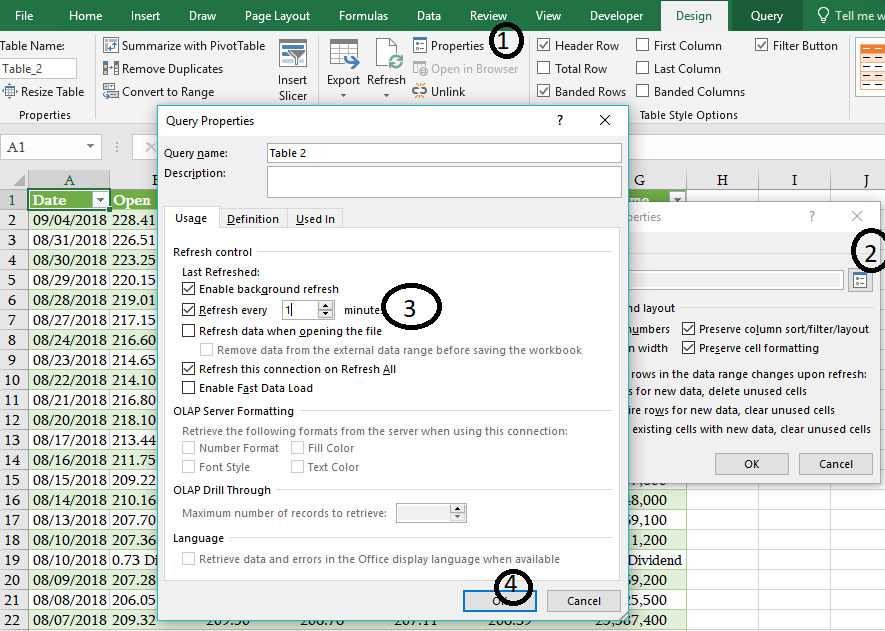
Data auto-update setting-
- Table’s properties
- Click on Properties button
- by clicking on the option ” Refresh Every” and Provide the time duration for data refresh.
- Ok
Happy Learning 😊
219 total views, 3 views today
Tag:corporate training companies, corporate training companies in Delhi, corporate training courses, corporate training in delhi, corporate training programs, excel course online, excel courses online, excel online course, excel online training, excel training in delhi, excel training online, How to import files with Power Query, How to import files with Power Query in Microsoft Excel, importing files with Power Query in Microsoft Excel, learn microsoft excel, learn ms excel online, learning excel online, learning microsoft excel, microsoft excel course, microsoft excel online training, microsoft excel training, ms excel learning, MS excel online training, ms excel training in delhi, online corporate training, online excel course, online excel training, online excel training courses, Power Query, Power Query in excel, Power Query in Microsoft Excel

You may also like

Heat Map Chart through Radio Button in Excel
27 December, 2018
How to Create a Histogram Chart in Excel
22 November, 2018
Count Functions in MS Excel
12 November, 2018