
In this blog post, we will learn the use of Solver. Excel solver belongs to a special set of commands referred to as what-if analysis tools. Its primary purpose is to use in various business and engineering tools.
It is helpful when dealing with all kinds of optimization problems where you need to take the best decision. For example, it can help us maximize the return on investment, choose the budget for your trip, it helps us to do market forecasting, minimize the delivery cost and so on.
How to add solver in excel-
The solver is not enabled by default in Excel. This feature is available from the office version 2003 to till Office 2019. To enable this option, kindly follow the below mention steps-
- File option
- Option
- Add-ins
- Choose the solver add-in
- Go
- Check mark on Solver add
- Ok
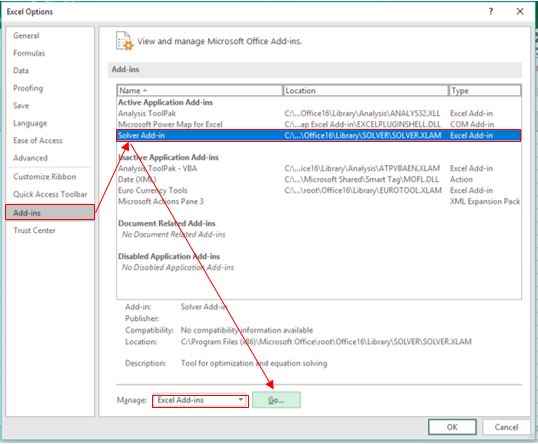
After successfully adding solver add-ins, it will reflect inside the Data Bar on the right side.

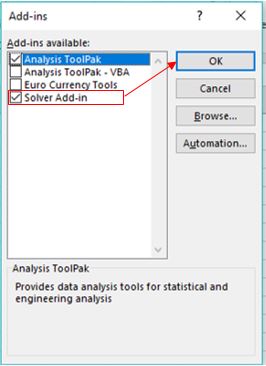
To get solver in Office 2003–
Go to the Tools menu, and click Add-Ins. In the Add-Ins available list, check the Solver Add-in box, and click OK.
Let’s take an example and understand, how can solver help in decision making?

This is an example of a manufacturing company Like “TVS”, which manufactures bikes on demand. The company wants to increase the maximum profit; therefore, it will have to increase the production unit but there are some terms & Conditions in production, which are given below-
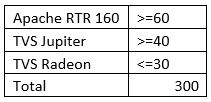
Apache RTR 160 model can produce more than 60 units.
TVS Jupiter model can produce more than 40 units
TVS Redon can produce less than or equal to 30
And the total number of production would have to be exact 300 units.
Based on the above mention T&C, we have to calculate the maximum profit. To get the answer to follow the given steps-
- Go to Data Tab
- Solver

Once we click on Solver option, we’ll get this dialogue box-
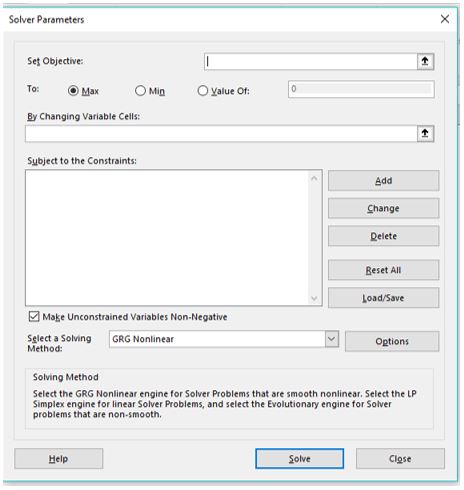
A solver is based on three parameters –
- Objective
- Variables
- Constraints
- Set Objective – The objective cell is a cell containing a formula that represents the objective, goal or ultimate goal of the result. (Cell $D$8)
- To: On the basis of the objective cell, the result can be maximum, minimum or a given value
- By changing cells: Select the variable range ($B:$5:$B$7)
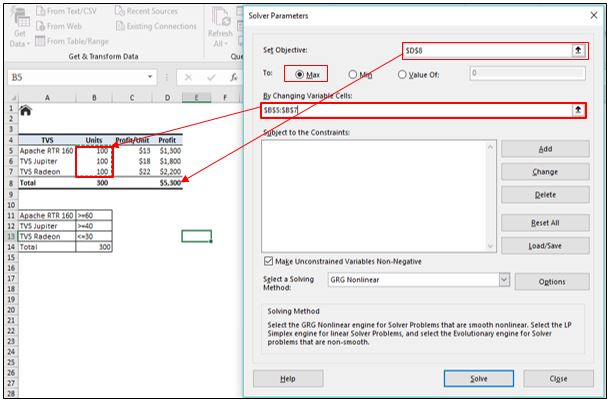
in the previous point, the First and second point was the part of Objective are, the third point was the part of variables. Now, we are moving to the part of constraints-
- Click on the add button right to the “Subject to the constraint box “
- In the constraint window
- Provide the constraint
(See the example below-)
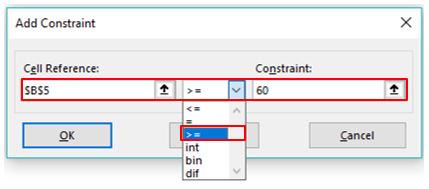
Click on Add button to add the constraint into the list. Continue to add other constraints then click on OK
Note:
Solver allows specifying the following relationships between the referenced cell and the constraint-
- Less than or equal to, equal to, and greater than or equal to. we set these relationships by selecting a cell in the Cell Reference box, choose one of the following signs: <=, =, or >=, and then typing a number, cell reference/cell name, or formula in the Constraint box (please see the above screenshot).
- Integer- If the referenced cell must be an integer, select it, and the word integer will appear in the Constraint box.
- Different values– Each cell in the referenced range must contain a different value, select dif, and the word All Different will appear in the Constraint box.
- Binary– If you want to limit a referenced cell either to 0 or 1, select bin, and the word binary will appear in the Constraint box.
To Edit and Delete an existing constraint-
Edit the constraint-
- Select the constraint
- Change
Delete the constraint
- Select the constraint
- Delete
In this example, the constraints are-

After we have configured all the parameters, Click the solve button at the bottom of the solver parameter window and let the solver find the optimal solution for our problem.
Depending on the given condition, the solver will take few seconds, few minutes or sometimes can take an hour to gives the result.
When solver has completed the processing, it will display the result, where we keep the solver solution and click Ok. Refer the screenshot given below-
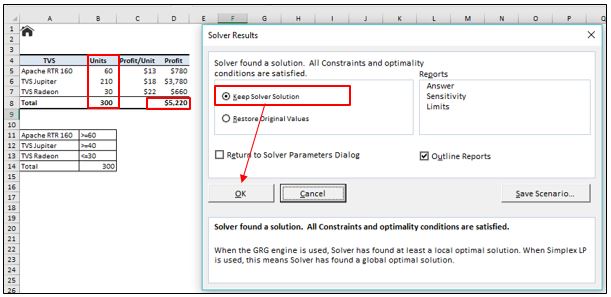
The solver window will close, and the solution will appear on the worksheet.
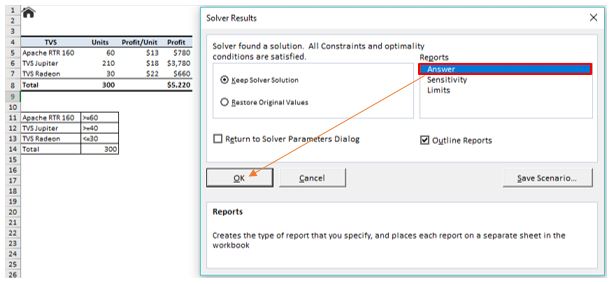
To get more details about the solved problem, click on report type in the report box and then click Ok. The report will be created on a new worksheet.
So, this is the way to apply solver on our database.
Hope, this blog post will help you a lot in your working database. We would love to hear your suggestion and ideas If you have any query feel free to ask in the comment box.
Stay connected with Nurture tech academy and Happy Learning 😊